Essential Travel Photography Tips for Stunning Photos and Editing Mastery
Travel photography captures place, mood, and story in a single frame, and mastering it means understanding composition, light, gear, and post-processing so your images convey emotion and context. This guide teaches practical travel photography techniques—from composition rules like the Rule of Thirds and leading lines to daylight strategies such as Golden Hour timing—and shows how to edit on mobile and desktop to make images pop for social platforms. Many photographers struggle with inconsistent results when shooting across varied environments, so this article emphasizes reproducible workflows that work with both mirrorless systems and smartphones, and includes Pakistan-specific shooting advice for regions like Hunza Valley, Fairy Meadows, Karachi, and Lahore. You will learn how to choose gear by budget, apply composition for iconic shots, harness natural light effectively, edit efficiently using Lightroom Mobile or comparable apps, and share photos responsibly with strong ethical practices. The structure follows clear, actionable sections: gear options by budget; composition mastery; natural light and exposure; editing workflows; top Pakistani destinations; smartphone shooting and social sharing; and ethical/responsible practices aimed at building a respectful UGC community.
ARY News publishes this Travel Photography series through its new lifestyle and travel vertical, offering editorial curation and location reporting that supports these techniques and destination advice. As a prominent Pakistani news and current affairs channel operating an information hub, ARY News provides destination features, photo case studies, and practical travel coverage that complement these photography tips. This article is produced under that editorial umbrella to connect readers with journalistic travel reporting and photography resources while keeping the focus on practical skills. Readers can expect neutral, informative recommendations and occasionally curated gear guidance from ARY’s editorial team to help make equipment and destination choices more practical for local photographers.
What Are the Best Travel Camera Gear Options for Every Budget?
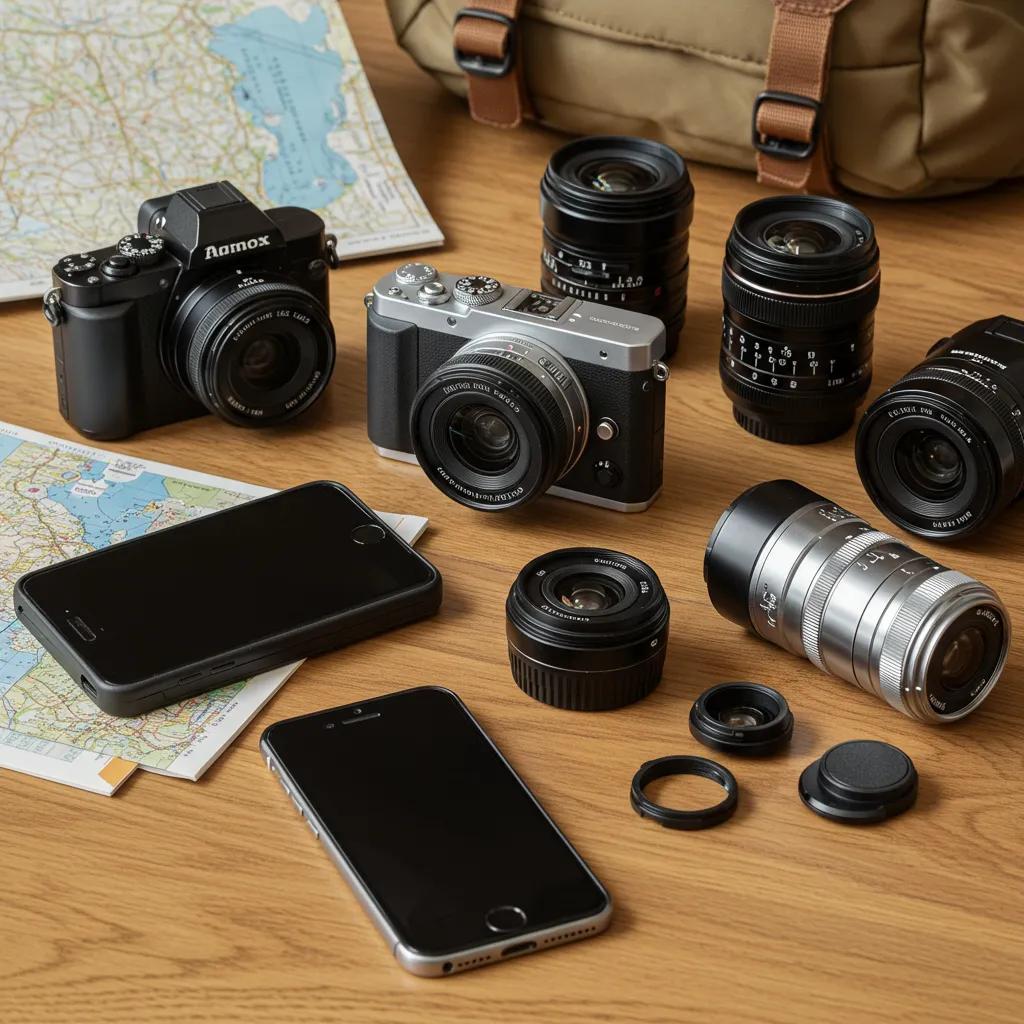
Travel camera gear should balance portability, durability, image quality, and battery life so you can shoot confidently in diverse environments. For budget-savvy beginners, a modern smartphone or compact camera delivers excellent results when paired with technique; mid-range photographers benefit from lightweight mirrorless bodies and a 24-70mm equivalent zoom that covers most travel scenarios; professionals will value full-frame mirrorless systems and a combination of wide-angle and telephoto lenses for landscape and distant subjects. Consider weight and battery management as core criteria, and choose weather-sealed equipment when traveling to harsh climates. Below are practical budget categories to help you decide quickly and capture consistent travel images.
Which Cameras Are Ideal for Travel Photography Beginners and Experts?
Entry-level travel photographers often get the best returns from high-quality smartphones or compact mirrorless cameras that offer RAW capture and built-in stabilization, enabling fast learning and immediate social sharing. Mid-range users typically choose lightweight mirrorless bodies with good autofocus and interchangeable lenses to gain flexibility without heavy baggage, while advanced photographers prioritize full-frame mirrorless or DSLR systems for superior dynamic range and high-ISO performance in low light. Portability versus image quality is the core tradeoff: smaller systems make it likelier you’ll shoot more often, but larger sensors give cleaner results. Evaluating battery life, lens ecosystem, and local service availability should shape your final decision when selecting a camera for travel.
What Essential Lenses Should You Carry for Landscape and Portrait Shots?
A practical travel lens kit often centers around two to three lenses that cover wide, standard, and telephoto needs to minimize weight and maximize versatility. For landscapes and architecture, a wide-angle (around 10–35mm equivalent) helps capture sweeping vistas and context, while a standard prime (35mm or 50mm) produces natural perspective and excellent low-light portraits; a telephoto (70–200mm equivalent) lets you isolate distant peaks or compress scenes for dramatic compositions. Bringing a lightweight zoom that spans wide to short-telephoto can reduce gear changes, and carrying a fast-prime offers low-light flexibility and pleasing background separation. Always factor lens weight and weather protection into packing decisions to keep mobility high during long day hikes.
Which Affordable Accessories Enhance Travel Photography on a Budget?
Low-cost accessories often deliver disproportionately large improvements in image quality and shooting flexibility, especially for travel scenarios with variable light and composition challenges. A compact, lightweight tripod enables long exposures, night sky photography, and stable video capture while remaining easy to pack; spare batteries and high-capacity memory cards reduce the risk of missed shots during extended outings. Budget filters such as polarizers and neutral density pieces provide better sky contrast and control over exposure in bright scenes; mobile photographers benefit from clip-on lenses and a small tabletop tripod for stable social content. Investing in a simple cleaning kit and comfortable camera strap improves reliability and comfort on long photo days.
Introductory comparison of common travel camera choices and why they suit different budgets and use-cases:
This table highlights that choice depends on the photographer’s priorities: portability, image quality, or versatility. The next section explores composition rules that elevate images regardless of gear.
How Can You Master Travel Photo Composition for Iconic Shots?
Composition is the arrangement of visual elements in a frame to guide the viewer’s eye and convey a story, and mastering it builds memorable travel images independent of equipment. Good composition relies on principles such as balance, leading elements, and careful placement of subjects to create context and emotional resonance; practicing these rules increases the chance that casual snapshots become iconic photographs. Start with simple rules and then learn when breaking them produces stronger images by emphasizing drama or cultural detail. Below, core techniques are defined with quick, actionable exercises to practice during walks and shoots.
What Is the Rule of Thirds and How Does It Improve Your Photos?
The Rule of Thirds divides the frame into thirds horizontally and vertically, placing primary subjects at intersection points to create balance and visual interest rather than centering everything. Using this technique helps foreground, middle ground, and background relate to each other and prevents static compositions, especially for landscapes and portrait arrangements. Practical examples include placing the horizon on the top or bottom third and aligning a subject’s eyes with an intersecting point to draw attention. Remember that the Rule of Thirds is a guideline; deliberately centering a subject or using symmetry can create stronger impact when appropriate, and understanding exceptions improves creative control.
How Do Leading Lines, Symmetry, and Framing Create Visual Impact?
Leading lines guide the viewer’s gaze through a photograph toward a focal point, making a scene feel dynamic and directional, while symmetry conveys formality and order that suits architecture and reflective scenes. Natural frames—arches, doorways, and windows—isolate subjects and provide depth by adding layers to a scene, enriching storytelling potential. In practice, use roads, rivers, or lines of trees as leading elements, seek symmetrical facades for formal portraits, and look for foreground elements that frame people or subjects. Applying these techniques transforms ordinary scenes into visually compelling images that communicate place and mood.
- Leading lines work best when they converge toward a subject to create depth.
- Symmetry creates a strong focal statement and suits architectural photography.
- Framing isolates subjects and adds narrative context to portraits and street scenes.
Use these techniques together to create layered, engaging compositions; the next section explains creative angles to capture unique perspectives in Pakistan’s varied landscapes.
Which Creative Angles and Perspectives Capture Unique Pakistani Destinations?
Changing your shooting angle transforms familiar subjects: low-angle shots emphasize mountains and monuments, while elevated or rooftop vantage points reveal cityscapes and human patterns in urban centers. Ground-level close-ups can highlight textures—carpets, pottery, or architectural details—helping tell cultural stories, and aerial or drone perspectives open compositional possibilities for large-scale landscapes when legal and safe to use. Always account for permissions and local regulations when flying drones, and prioritize safety and respect for people when seeking elevated viewpoints. Experimenting with perspective encourages original images that stand out from typical travel photography.
When Is the Best Time to Shoot: How to Harness Natural Light for Travel Photography?
Natural light shapes the mood, texture, and color of travel photos, and timing shoots around light quality greatly improves results without complex gear. Golden Hour—shortly after sunrise and before sunset—produces warm, directional light that enhances depth and saturation, while Blue Hour offers cool tones and ideal conditions for long exposures and cityscapes. Midday sun can be harsh but is manageable with shade, polarizers, and exposure techniques; low light requires tripod use, wider apertures, and ISO management. Understanding these periods and their effects on color temperature and shadow behavior lets you plan shoots to suit the narrative you want to create in each location.
What Makes Golden Hour and Blue Hour Perfect for Travel Photos?
Golden Hour provides soft, warm directional light that sculpts landscapes and adds warmth to skin tones, making it ideal for both wide vistas and intimate portraits with natural rim light. Blue Hour occurs when the sun is below the horizon and the sky takes on deep blue tones that contrast beautifully with artificial lights, which is perfect for cityscapes and long-exposure compositions. Use simple sunlight calculators on a mobile device to plan exact shooting windows and arrive early to scout compositions; arrive late to capture transitional color changes. These short windows reward planning and can transform an average scene into a memorable image.
How Do You Adjust Camera Settings for Harsh Midday Sun and Low Light?
In harsh midday sun, reduce lens aperture to avoid overexposure, use faster shutter speeds, and consider neutral density filters to control highlights; for portraits, find open shade or use fill flash to soften shadows on faces. In low light, open the aperture, stabilize the camera on a tripod, and increase ISO with noise-management techniques to retain detail—using bracketing and exposure stacking can help preserve dynamic range. Applying exposure compensation and shooting RAW gives flexibility during editing to correct white balance and recover highlight or shadow detail. These adjustments ensure technically sound images across variable lighting conditions.
How Can You Use Shadows and Reflections to Enhance Your Images?
Shadows and reflections introduce secondary composition layers and add visual interest, turning plain scenes into narrative images through silhouette, contrast, and mirrored symmetry. Reflections in water, glass, or polished surfaces double compositional elements and can produce near-symmetrical frames that emphasize architecture or mountain vistas. Harsh shadows can be used purposefully to create dramatic shapes, while backlighting creates silhouettes that tell strong stories with minimal detail. Practice observing how light casts across surfaces at different times of day to find moments where shadows and reflections become core compositional tools.
What Are the Essential Travel Photography Editing Tips for Beginners?
Editing turns captured potential into final imagery by correcting exposure, refining color, and sharpening details while preserving natural tones and context, and a few consistent steps dramatically raise image quality. Start with exposure and contrast, then correct white balance, crop for composition, and apply localized adjustments sparingly to preserve authenticity; finishing touches include subtle sharpening and noise reduction as needed. Mobile editing tools like Lightroom Mobile allow RAW adjustments on the go, while desktop Lightroom and Photoshop offer batch processing and advanced retouching for larger projects. Below are practical editing workflows and an app comparison to help you choose the right tools for your workflow.
Intro to editing app comparison and what to expect from the table below.
This comparison clarifies that Lightroom Mobile excels for mobile-first workflows, Snapseed for quick selective fixes, and desktop Lightroom for heavy editing and batch work. Next, a focused Lightroom Mobile workflow explains step-by-step adjustments beginners can apply immediately.
The Digital Darkroom: Essential Photo Editing Workflow for Travel
Tablets, however, are a great option when travelling for image editing on the go. The digital darkroom is an essential part of your workflow, with image editing being an equally significant aspect of the photographic process.
The Digital Darkroom: The Definitive Guide to Photo Editing, 2021
How Do You Use Lightroom Mobile for Vibrant Travel Photo Enhancements?
A concise Lightroom Mobile workflow begins with importing RAW where possible, then setting exposure and contrast to establish base tonal balance, followed by white balance correction and gentle vibrance adjustments to enhance skies and foliage. Use the HSL/Color mixer to target specific hues without global oversaturation, and apply subtle sharpening and noise reduction to improve perceived detail while avoiding artifacts. Utilizing presets can speed up batch edits, but always fine-tune per image to match scene-specific lighting; saving edits as presets helps maintain a consistent look across a travel set. This approach yields vibrant but natural images suited for both web and print uses.
What Are Quick Editing Techniques for Cropping, Sharpening, and Color Correction?
Quick edits that improve most travel photos include cropping for stronger composition, modest sharpening to enhance edge detail, and white balance correction to ensure realistic color rendering across different lighting conditions. Crop to remove distracting elements and tighten the focal point while keeping aspect ratios compatible with intended display formats like 4:5 for portrait social posts. For sharpening, use subtle amounts and apply masking to avoid amplifying noise in flat areas; adjust white balance with temperature and tint sliders to match visual memory of the scene. These fast fixes significantly improve image quality with minimal time investment.
Which Apps and Software Are Best for Travel Photo Post-Processing?
Choosing an editing app depends on your workflow: mobile-first creators will prefer Lightroom Mobile or Snapseed for on-the-go RAW and selective edits, while those producing larger portfolios benefit from desktop Lightroom and Photoshop for batch processing and advanced retouching capabilities. Consider free versus subscription tiers and the availability of platform syncing if you work across devices; Snapseed is excellent as a no-cost option for quick fixes, whereas Lightroom offers robust cloud sync and professional-grade color tools. Evaluate your needs—speed, depth, and output format—and select tools that integrate smoothly into your travel routine.
Where Are the Best Pakistani Destinations for Capturing Stunning Travel Photos?
Pakistan offers diverse photographic opportunities—from towering northern peaks to bustling urban streets—each requiring tailored techniques, timing, and gear to capture its unique character. Northern areas like Hunza Valley and Fairy Meadows reward planning around Golden Hour and offer sweeping vistas suited to wide-angle lenses, whereas Karachi and Lahore provide vibrant street scenes that benefit from fast primes and sensitivity to cultural norms. Historical cities like Multan and Peshawar require respectful approaches to document heritage sites and local artisans while observing legal considerations and permissions. Below is a practical mapping of destinations to seasons, gear, and ideal times to help plan effective shoots.
Intro to destination table and how to use it for trip planning.
This destination mapping shows that choosing the right season and gear directly affects image outcomes; use local reports and ARY News destination archives and photo case studies for recent coverage, route suggestions, and practical travel advice when planning shoots. Next, specific techniques for northern landscapes and urban street photography are described.
How Do You Photograph the Majestic Landscapes of Northern Areas Like Hunza Valley?
Mountain landscapes require attention to dynamic range, perspective layering, and weather readiness, so shoot during Golden and Blue Hours to capture peak colors and depth, and bracket exposures for scenes with bright snow and deep shadows. Use polarizing filters to deepen skies and reduce glare from snow or water, and stabilize the camera with a sturdy tripod for panoramas and long exposures. Carry weather-sealed gear or protective covers, extra batteries for cold conditions, and plan acclimatization time if trekking; smaller, lighter setups increase mobility on high-altitude hikes. Prioritize scouting viewpoints early in the day to find compositions that show scale and human context.
What Are the Best Techniques for Capturing Urban and Street Life in Karachi and Lahore?
Street photography thrives on fast primes, quick autofocus, and cultural sensitivity; using a 35mm or 50mm lens keeps you close to the action and adapts well to both candid portraits and environmental scenes. Work at higher shutter speeds for movement, use higher ISO settings with noise-management in post, and respect personal boundaries by asking permission for close-up portraits; offering a printed image or sharing contact details can build goodwill. Scout neighborhoods during safer daylight hours, connect with local guides where possible, and observe social norms around dress and photographing sensitive subjects. Candid storytelling combined with respectful interaction yields photographs that honor people and place.
How Can You Document Historical and Cultural Scenes in Multan and Peshawar?
Photographing heritage and cultural events requires sensitivity, patience, and an eye for contextual details such as textures, architecture, and artisans at work; these elements tell richer stories than isolated portraits. Seek permits when photographing restricted sites, dress respectfully, and approach subjects with clear, polite requests for consent; using a longer focal length can allow for honest distance while still capturing expressions. Capture festivals and daily life by focusing on gestures, materials, and environment to build narrative series rather than single images. When in doubt, prioritize consent and cultural norms to ensure images contribute positively to local representation.
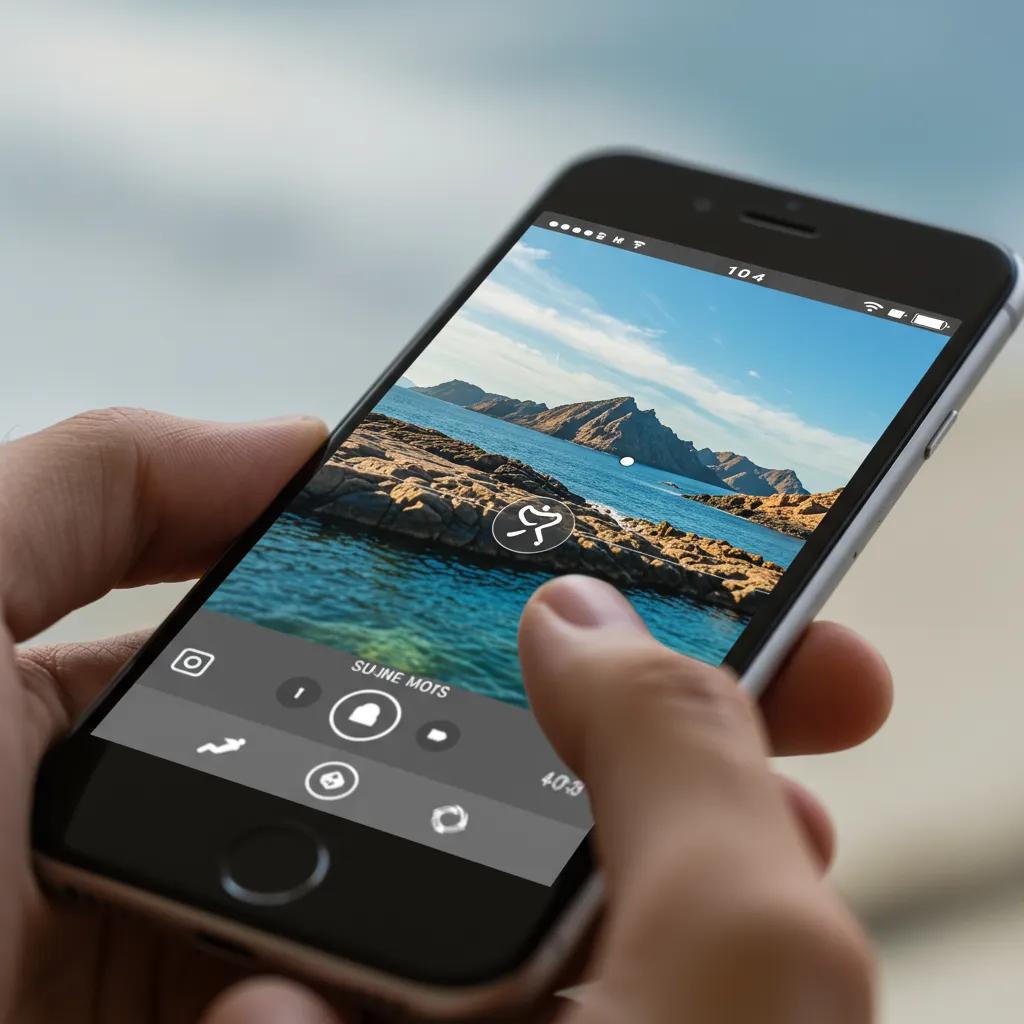
How Can You Take Professional Travel Photos Using Your Smartphone?
Smartphones today capture publishable travel images when you control exposure, use available modes wisely, and invest in a few compact accessories that expand creative options. Utilize Pro or RAW modes when available, lock focus and exposure to maintain consistency, and use HDR selectively to handle high dynamic range scenes; shoot multiple frames to choose the best moment. Accessories such as a small gimbal, clip-on lenses, and a portable tripod convert your phone into a versatile travel camera for both stills and short-form video. Below are practical checklists and social export tips tailored for Instagram and TikTok sharing.
What Smartphone Settings and Accessories Improve Travel Photography Quality?
Enable Pro or RAW capture to retain maximum tonal data, lock exposure and focus for consistent frames, and use grid overlays to apply composition rules like the Rule of Thirds. Affordable accessories—clip-on wide or tele lenses, a mini-tripod, and a lightweight gimbal—add stabilization and framing options that elevate photo and video quality with minimal bulk. Keep your phone battery management in mind and carry a small power bank for long days of shooting. These settings and accessories help bridge the gap between casual snapshots and consistently strong travel photography.
- Enable RAW/Pro mode for maximum edit flexibility.
- Use clip-on lenses and a mini-tripod to expand creative options.
- Carry a power bank to avoid lost shooting time.
These steps prepare your phone for professional-looking images; next is a streamlined mobile editing workflow for social sharing.
How Do You Edit Travel Photos on Mobile for Social Media Sharing?
A fast mobile edit workflow focuses on crop, exposure, color, and output sizing: crop to the platform ratio, set exposure and contrast to balance highlights and shadows, adjust white balance for accurate tones, and apply subtle sharpening and noise reduction. Export at recommended sizes and high-quality JPEG/HEIC settings for Instagram and TikTok, and use platform-native tools for final trims or filters to preserve authenticity while matching platform aesthetics. Keep edits natural to maintain the story and texture of the scene, and save presets or copy edits to maintain consistency across a trip’s photo set. This workflow ensures quick turnaround for social posting without sacrificing image quality.
What Are the Best Practices for Sharing Travel Photos on Instagram and TikTok?
Different formats serve different storytelling goals: use carousels for multi-image narratives, Reels for short tutorial-style clips and motion, and single-image posts for standout frames; combine captions that describe context with local hashtags to reach regional audiences. Maintain a predictable posting cadence, engage with commenters, and encourage user-generated content by inviting followers to share their versions of a location or technique while tagging your profile. When featuring community images, always credit contributors and request permission before reposting to maintain ethical sharing practices. These practices build engagement while respecting contributors and local communities.
What Are Ethical and Responsible Practices for Travel Photography?
Responsible travel photography centers on respect for people, cultures, and legal frameworks while emphasizing consent, accurate representation, and sensitivity to context. Ethics demand asking permission for portraits, avoiding exploitative imagery of vulnerable people or situations, and crediting contributors appropriately for their work. Be aware of site-specific restrictions and drone regulations, and prioritize safety and cultural norms when photographing religious or sensitive locations. Encouraging thoughtful user-generated content builds a community of respectful photographers who share images responsibly and celebrate places without harm.
How Do You Respect Local Cultures and Privacy While Photographing?
Respect begins with asking permission before photographing individuals, explaining how images will be used, and accepting refusals without pressure; offering to share images or contact information demonstrates good faith. Dress and behave in ways that align with local customs when entering religious or sensitive sites, and avoid photographing ceremonies or private moments without consent. Use contextual framing that shows dignity and agency for subjects rather than reducing them to stereotypes, and seek local guidance when unsure about cultural norms. These practices foster trust and yield more meaningful photographic interactions.
What Are the Legal Considerations for Travel Photography in Pakistan?
Photographers should avoid photographing military or government installations and should verify local rules for restricted areas, as regulations can change and permissions may be required for professional shoots or drone flights. Drone use may be restricted in certain regions; always check current local regulations and obtain necessary clearances before flying, and respect signs and local authority instructions regarding photography restrictions. Privacy norms vary by community, so prioritize consent and err on the side of caution when photographing people or private property. Staying informed about legal boundaries protects both photographer and subject.
How Can You Encourage User-Generated Content to Build a Travel Photography Community?
Building a respectful UGC community involves clear submission guidelines, consent protocols, and thoughtful editorial curation that highlights contributors while protecting their rights and dignity. Run themed photo calls with explicit rules for attribution and usage rights, request model releases when featuring identifiable individuals, and moderate submissions for quality and cultural sensitivity before publishing. Offer community recognition such as editorial features or social reposts as non-commercial incentives that encourage participation while ensuring fair credit. Inviting readers to contribute creates a richer, more diverse travel photography conversation when done ethically.
ARY News encourages photographers to submit travel images and participate in community features through its Travel Photography Hub, where ARY’s editorial team curates user submissions and destination photo case studies for respectful showcase opportunities. Participation guidelines emphasize consent, proper attribution, and cultural sensitivity so contributors understand how images will be used in editorial features. This community-building approach aligns with ARY News’s role as an information hub that connects photographers, storytellers, and local audiences while maintaining journalistic standards and ethical publication practices.
Conclusion
Mastering travel photography not only enhances your ability to capture stunning images but also deepens your connection to the places you visit. By applying the techniques outlined in this guide, you can elevate your photography skills, ensuring that each shot tells a compelling story. Embrace the journey of learning and experimentation, and consider sharing your experiences with our community for further inspiration. Explore more resources and connect with fellow photographers to continue your creative adventure today.